一、背景
Sentry是一个线上日志监控平台,可以做的事情有很多,十分强大。可以监控线上异常并通过哨兵系统实时推送到人,拥有强大的在线异常分析功能。
并支持线上页面实时APM性能分析,监控首屏加载时间、接口耗时、热启动、冷启动时间等,开源免费支持自定义部署。
二、Sentry基础使用
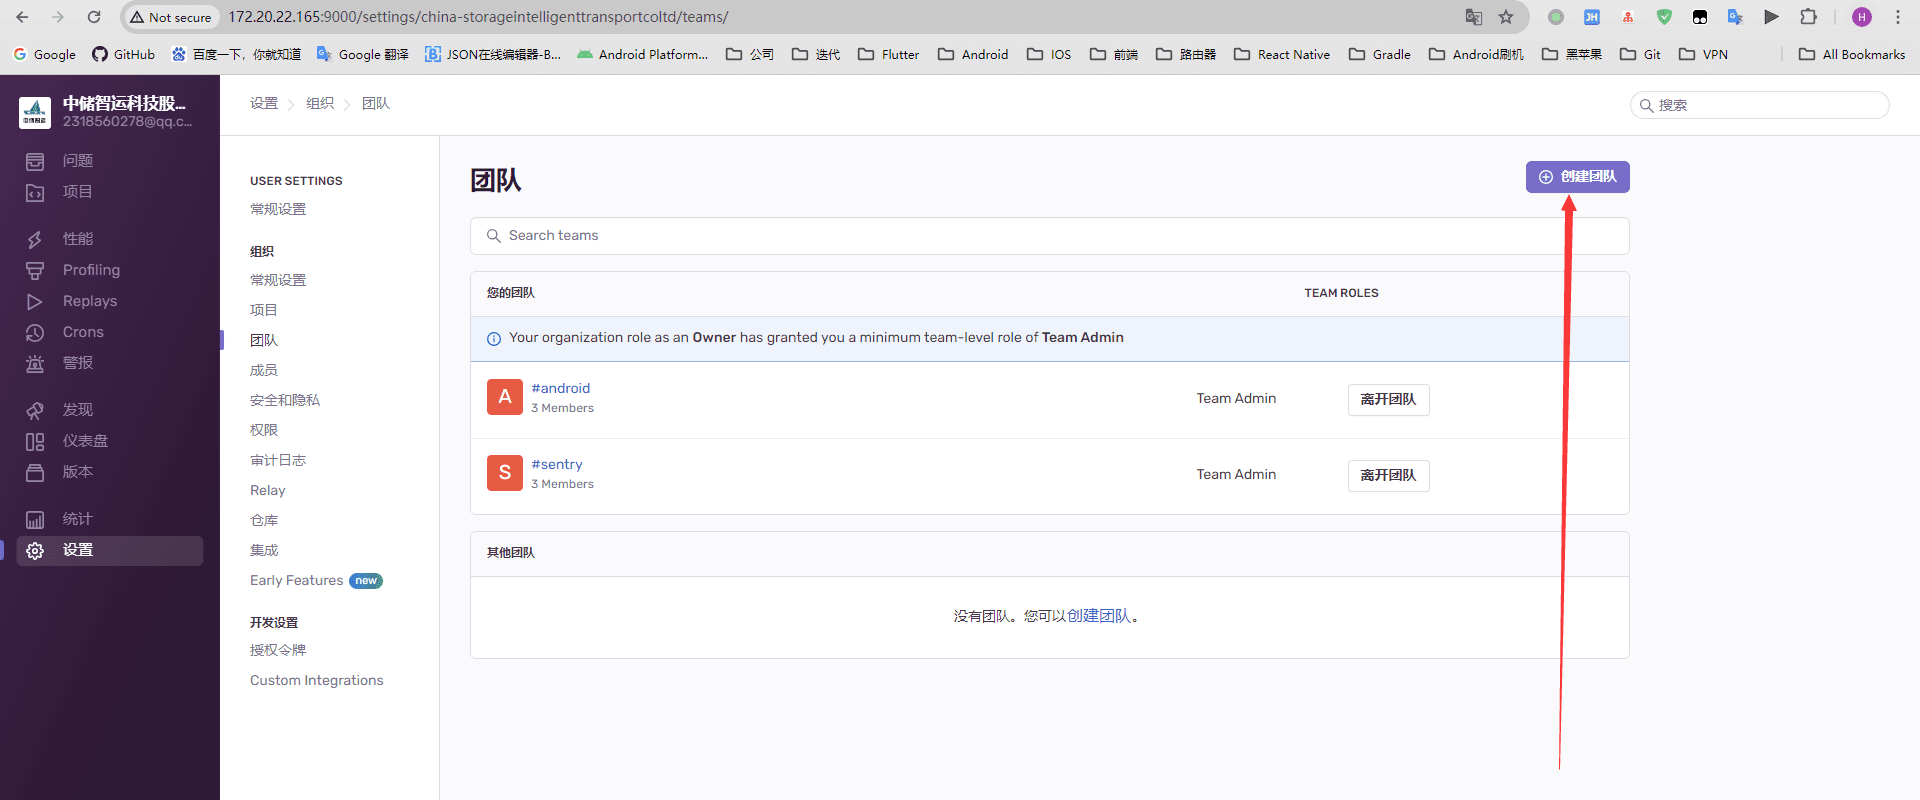
团队的创建
Sentry中你得先加入一个团队,才可以看到团队中具体的项目,项目都是以团队的角度来进行划分的,一个人可以加入多个团队中。
项目的创建
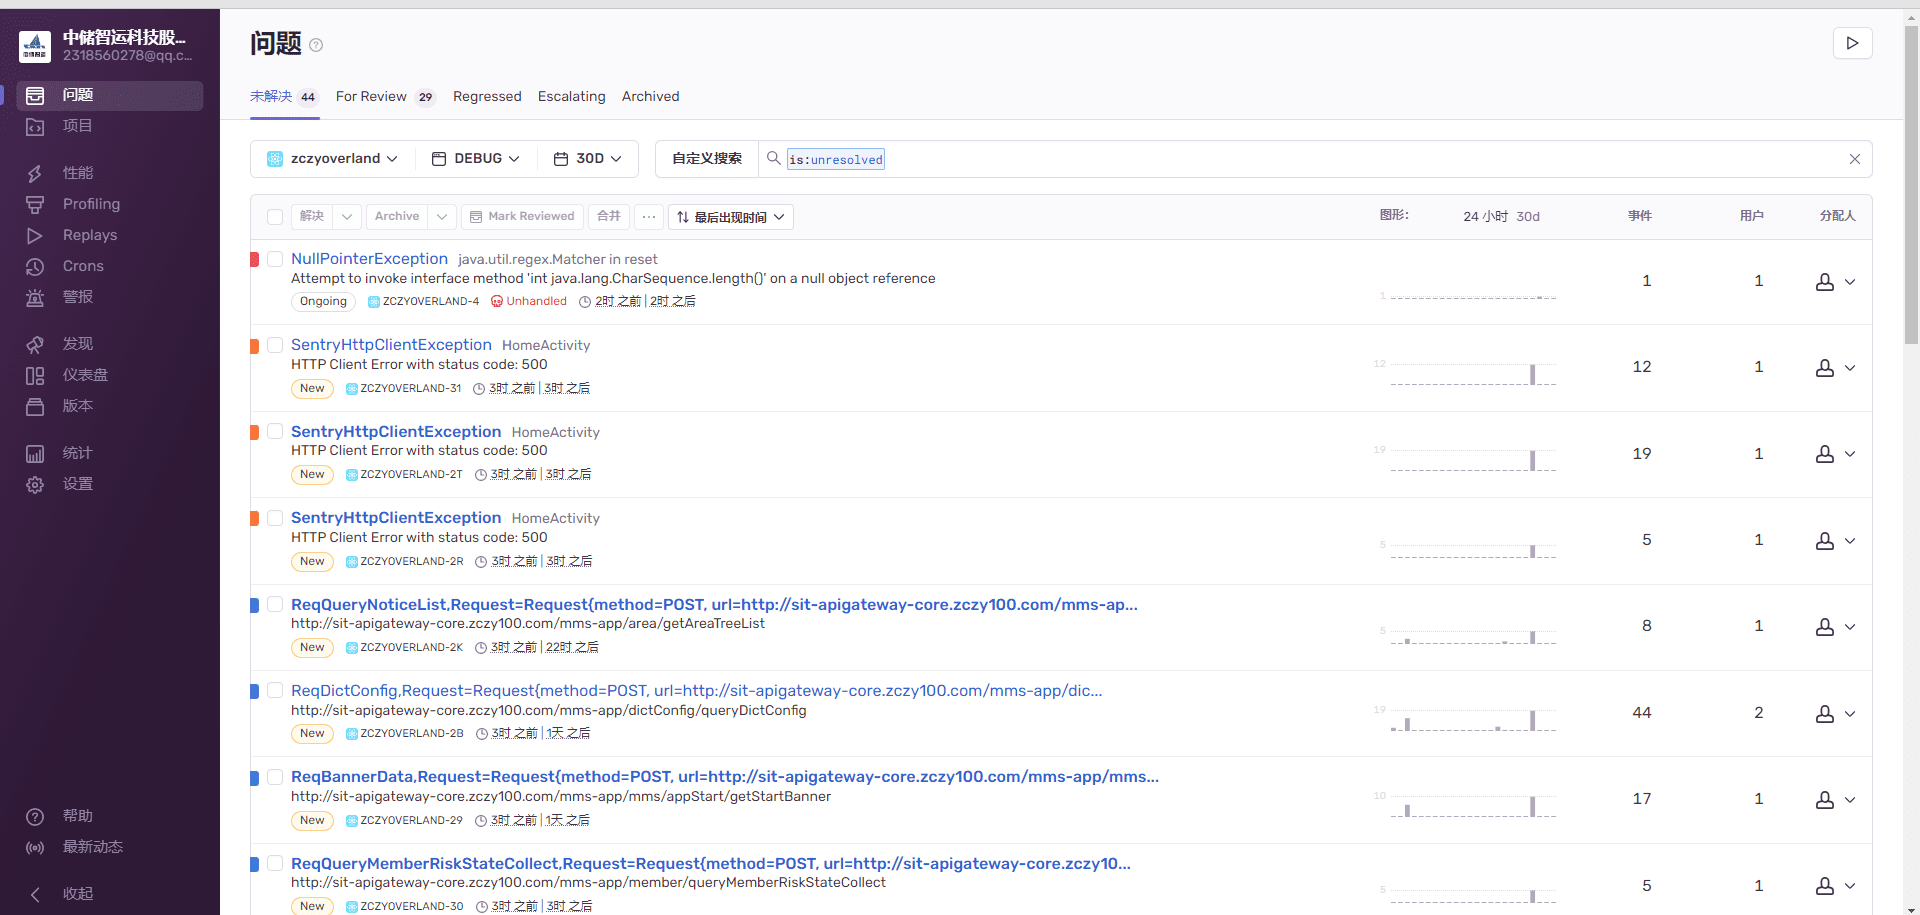
Sentry中上报都是以项目维度来进行上报的,创建具体的项目,生成项目对应的DSN。然后把Sentry集成到对应的工程中,就可以进行正常的上报。
Sentry的基础集成
Sentry集成,官方文档都有,这里不做过多的赘述,具体查看官网即可。
各端集成文档引导:
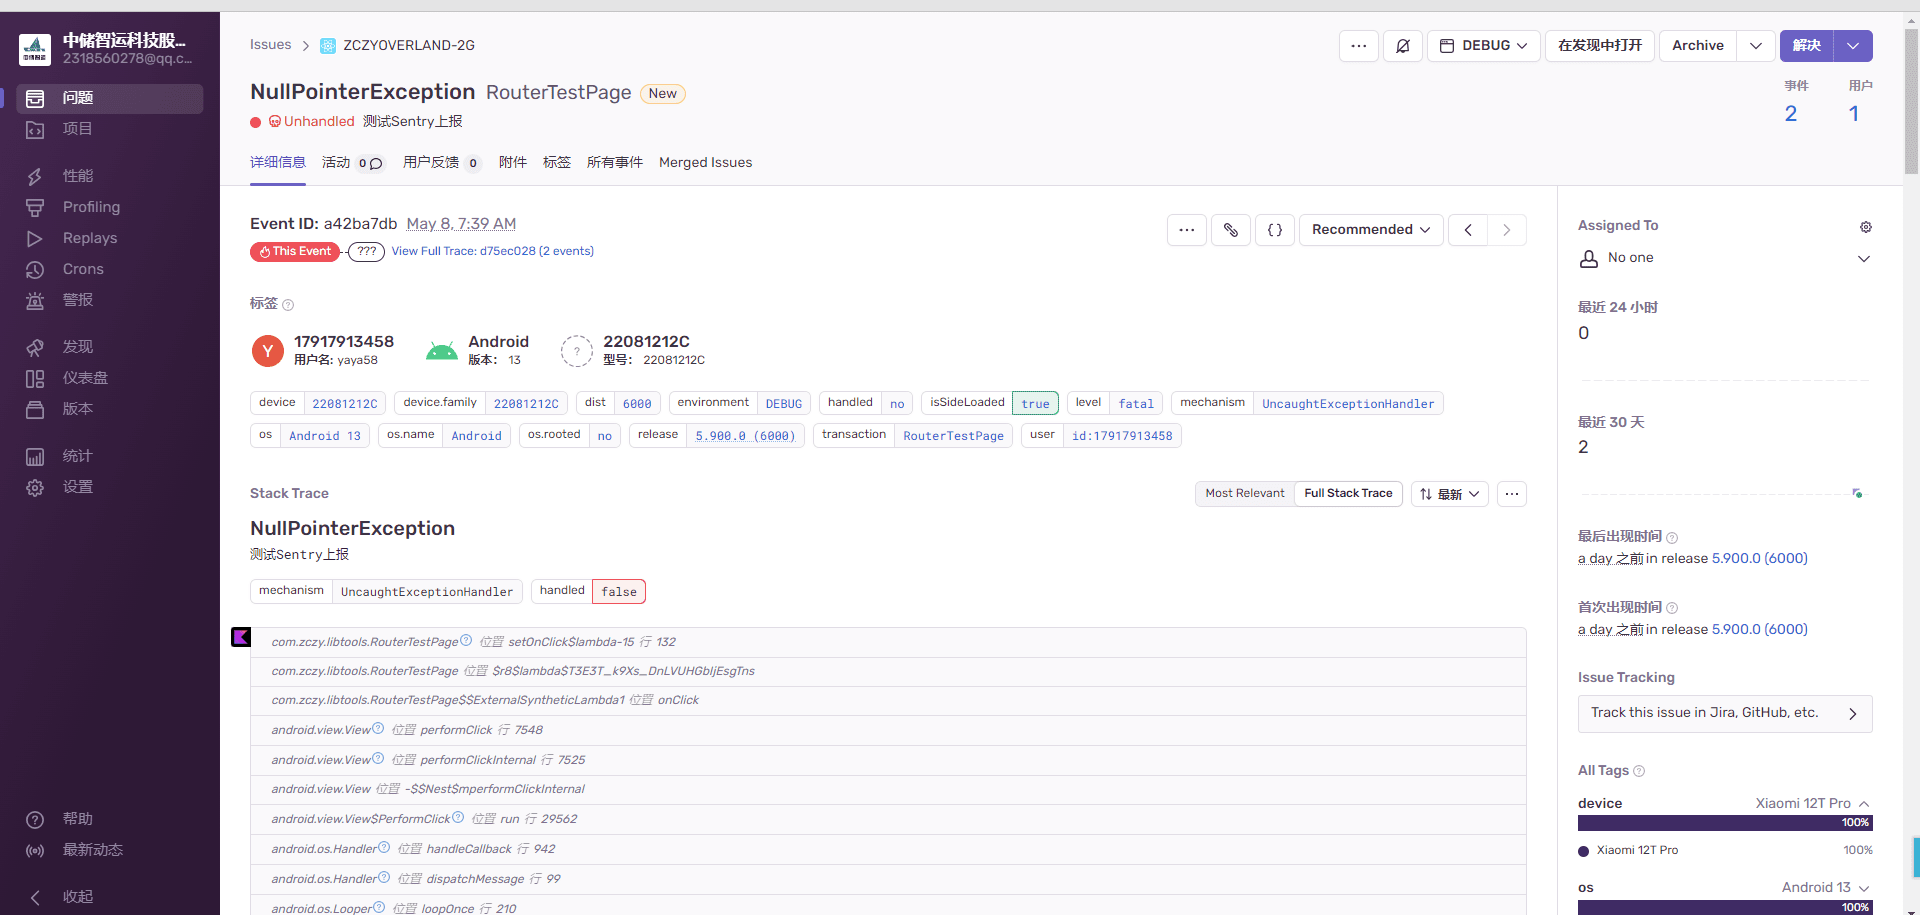
集成结束之后,可以写一个测试异常,不出意外Sentry将自动上报你触发的异常,点击异常既可以查看报错详情
三、Sentry高阶使用
Sentry自定义上报
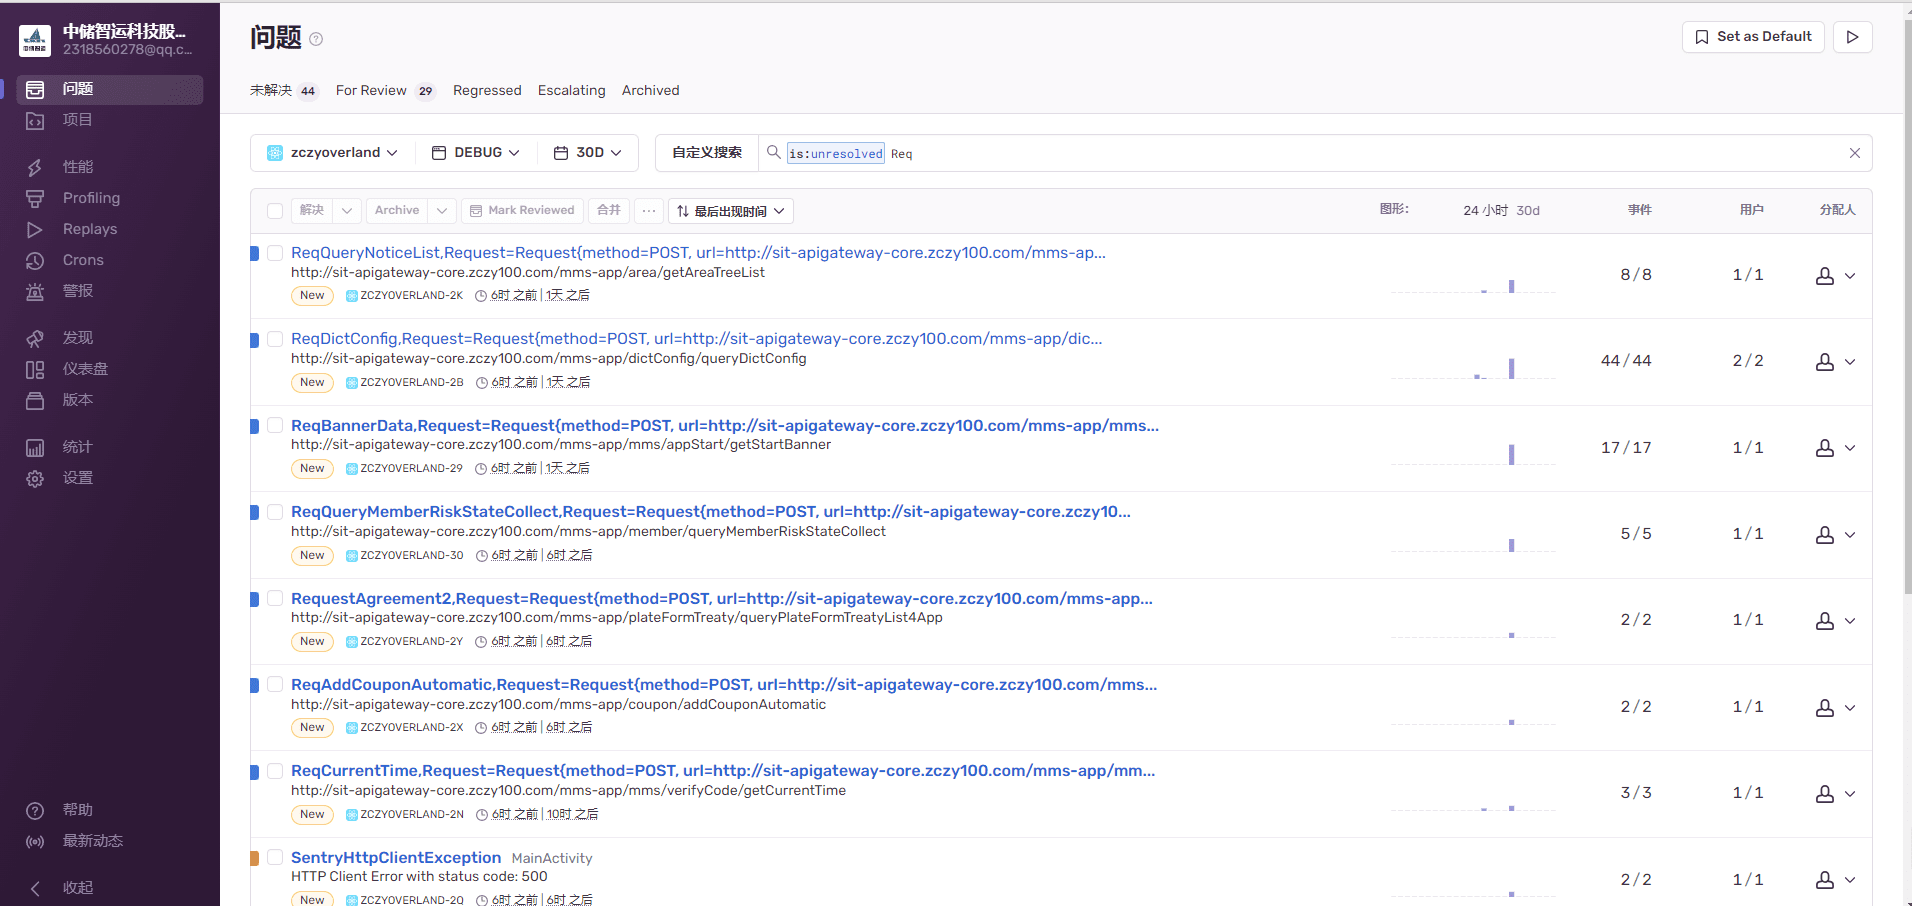
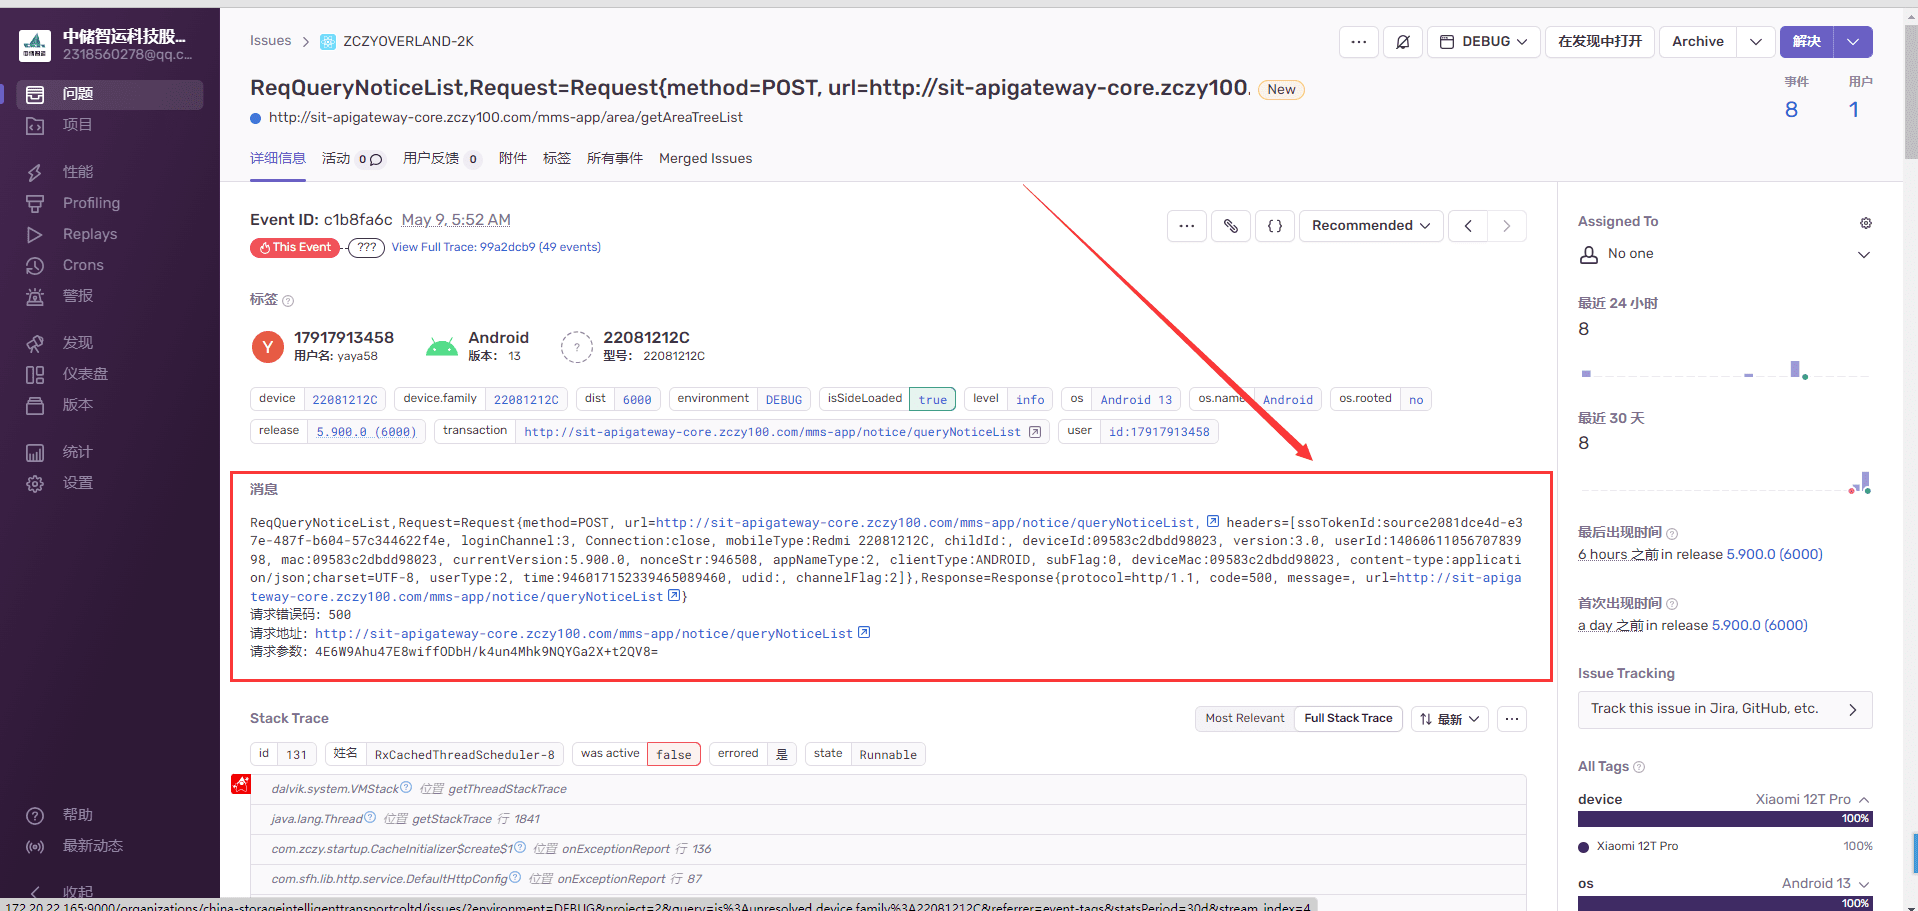
Sentry除了可以上报异常报错之外,用户也可以自己上报自己想要的自定义信息,例如Android中我要上报接口异常之后,我要把这部分异常信息单独打标上报到Sentry中方便我后续分析监控。
 1
 2
 3
 4
 5
 6
 7
 8
 9
10
11
12
13
| //Sentry上报接口日志
val errorMsgBuilder = StringBuilder(errorMsg)
errorMsgBuilder.append("\n")
errorMsgBuilder.append("请求错误码:").append(errorCode).append("\n")
errorMsgBuilder.append("请求地址:").append(url).append("\n")
errorMsgBuilder.append("请求参数:").append(outreachRequest?.buildParam())
val sentryEvent = SentryEvent()
sentryEvent.level = SentryLevel.INFO
sentryEvent.transaction = url
val sentryMessage = Message()
sentryMessage.message = errorMsgBuilder.toString()
sentryEvent.message = sentryMessage
Sentry.captureEvent(sentryEvent)
|
APM性能监控
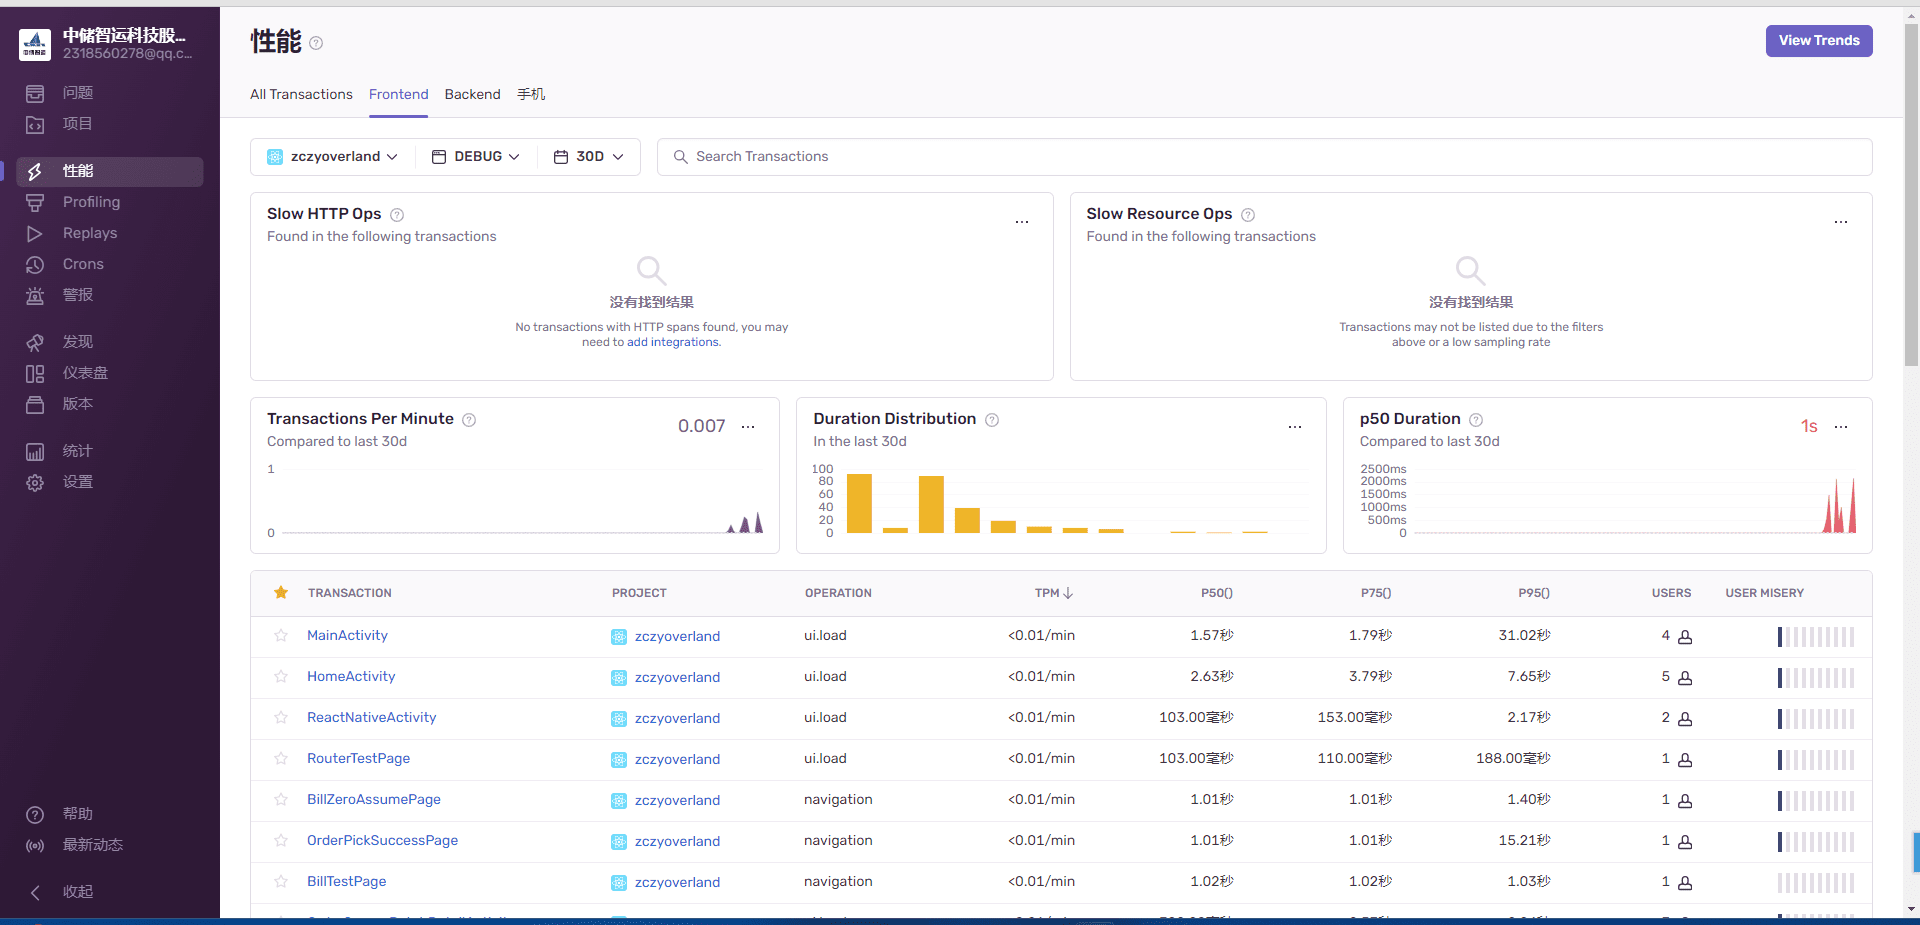
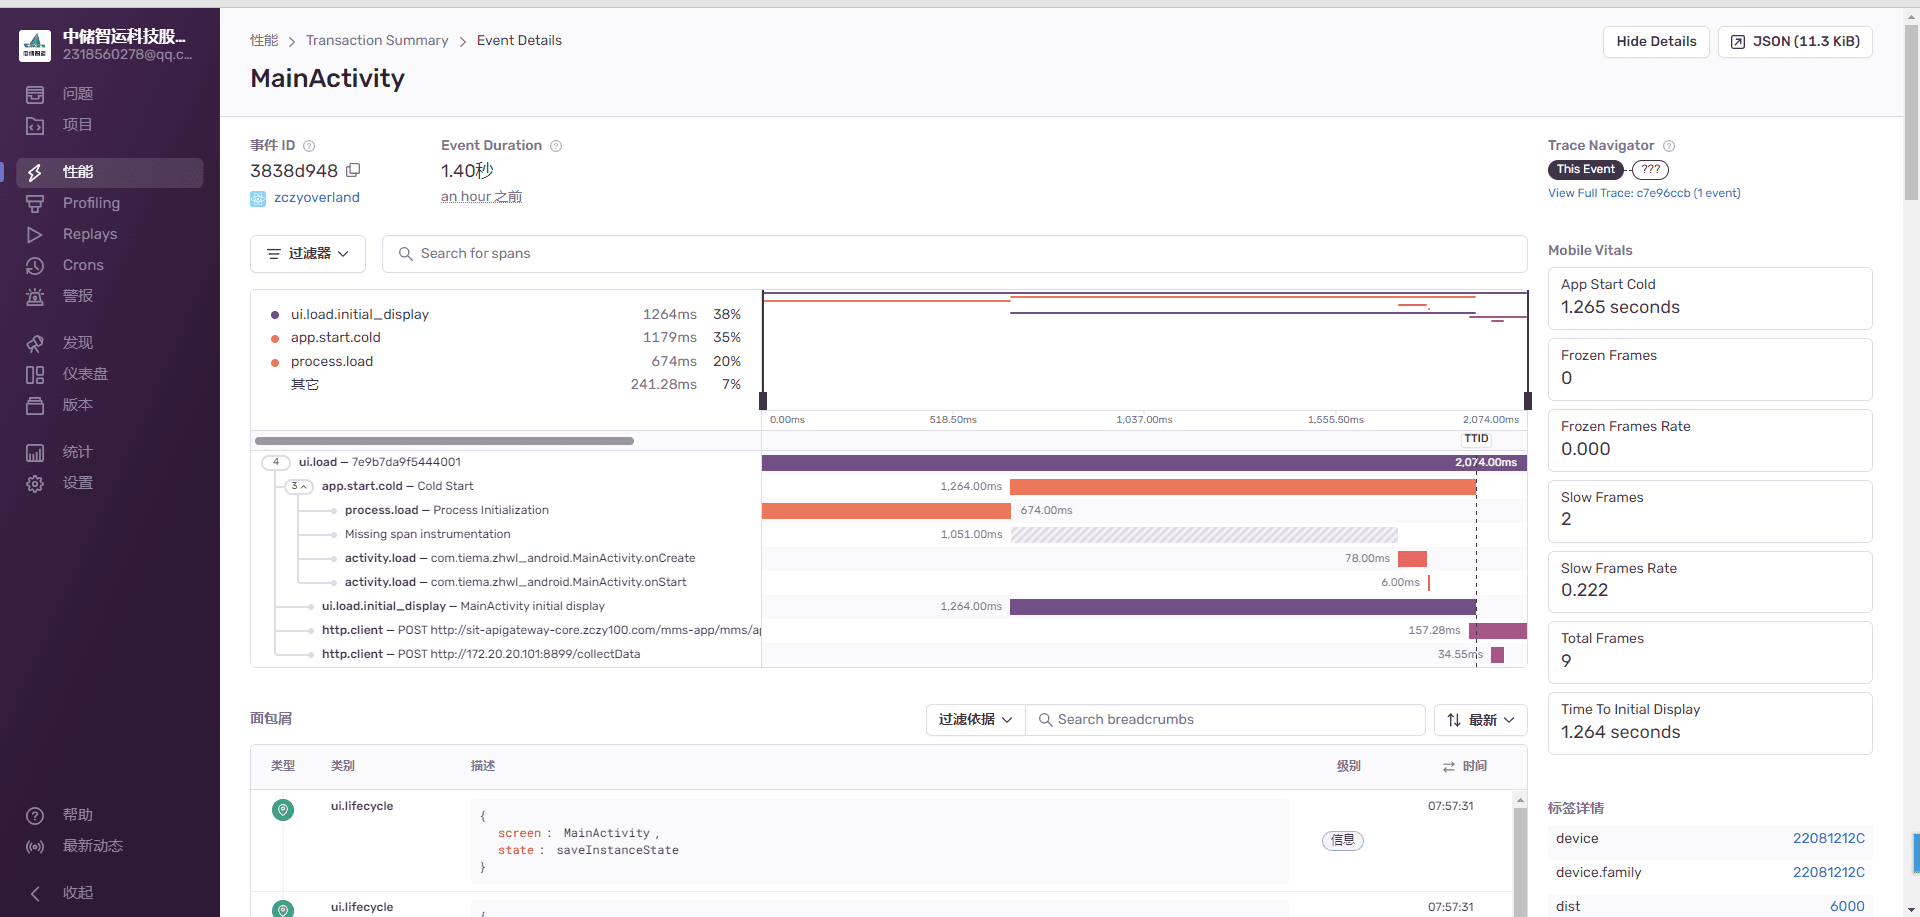
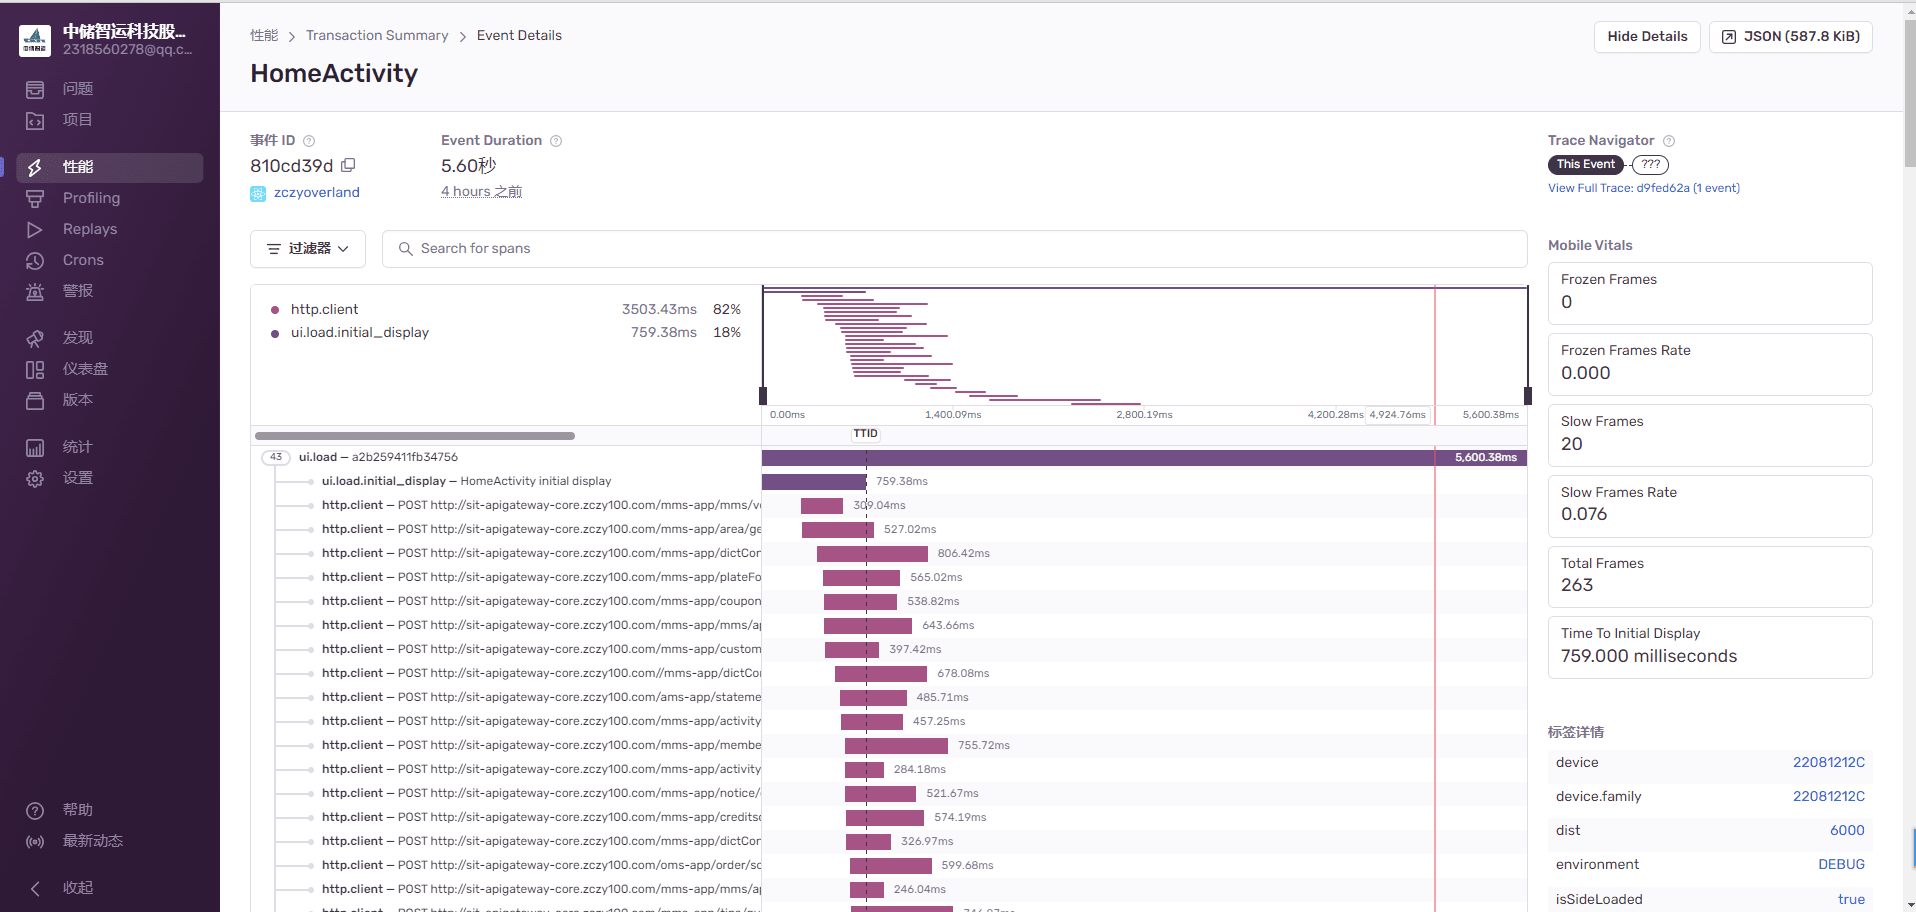
Sentry另一个强大的地方,可以很方便的帮你实现APM性能监控,实时监控每个页面的各种耗时。
Sentry性能监控最简单的开启方式,这里以Android为例,只需要在初始化的时候设置采样率tracesSampleRate 即可,其他技术栈类似也是设置这个值。
设置为1.0则线上100%用户全部上报,设置0.7则线上70%用户上报。当我们用户量很大的时候,不要设置1.0,这样会把Sentry服务器撑爆!!!
1
2
3
4
5
6
| //Sentry初始化
SentryAndroid.init(context) {
it.dsn = "http://c0c9f0d0b6726039a6bf140829b5aaf4@172.20.22.165:9000/2"
it.environment = if (BuildConfig.DEBUG) "DEBUG" else "RELEASE"
it.tracesSampleRate = 1.0
}
|
Sentry面包屑
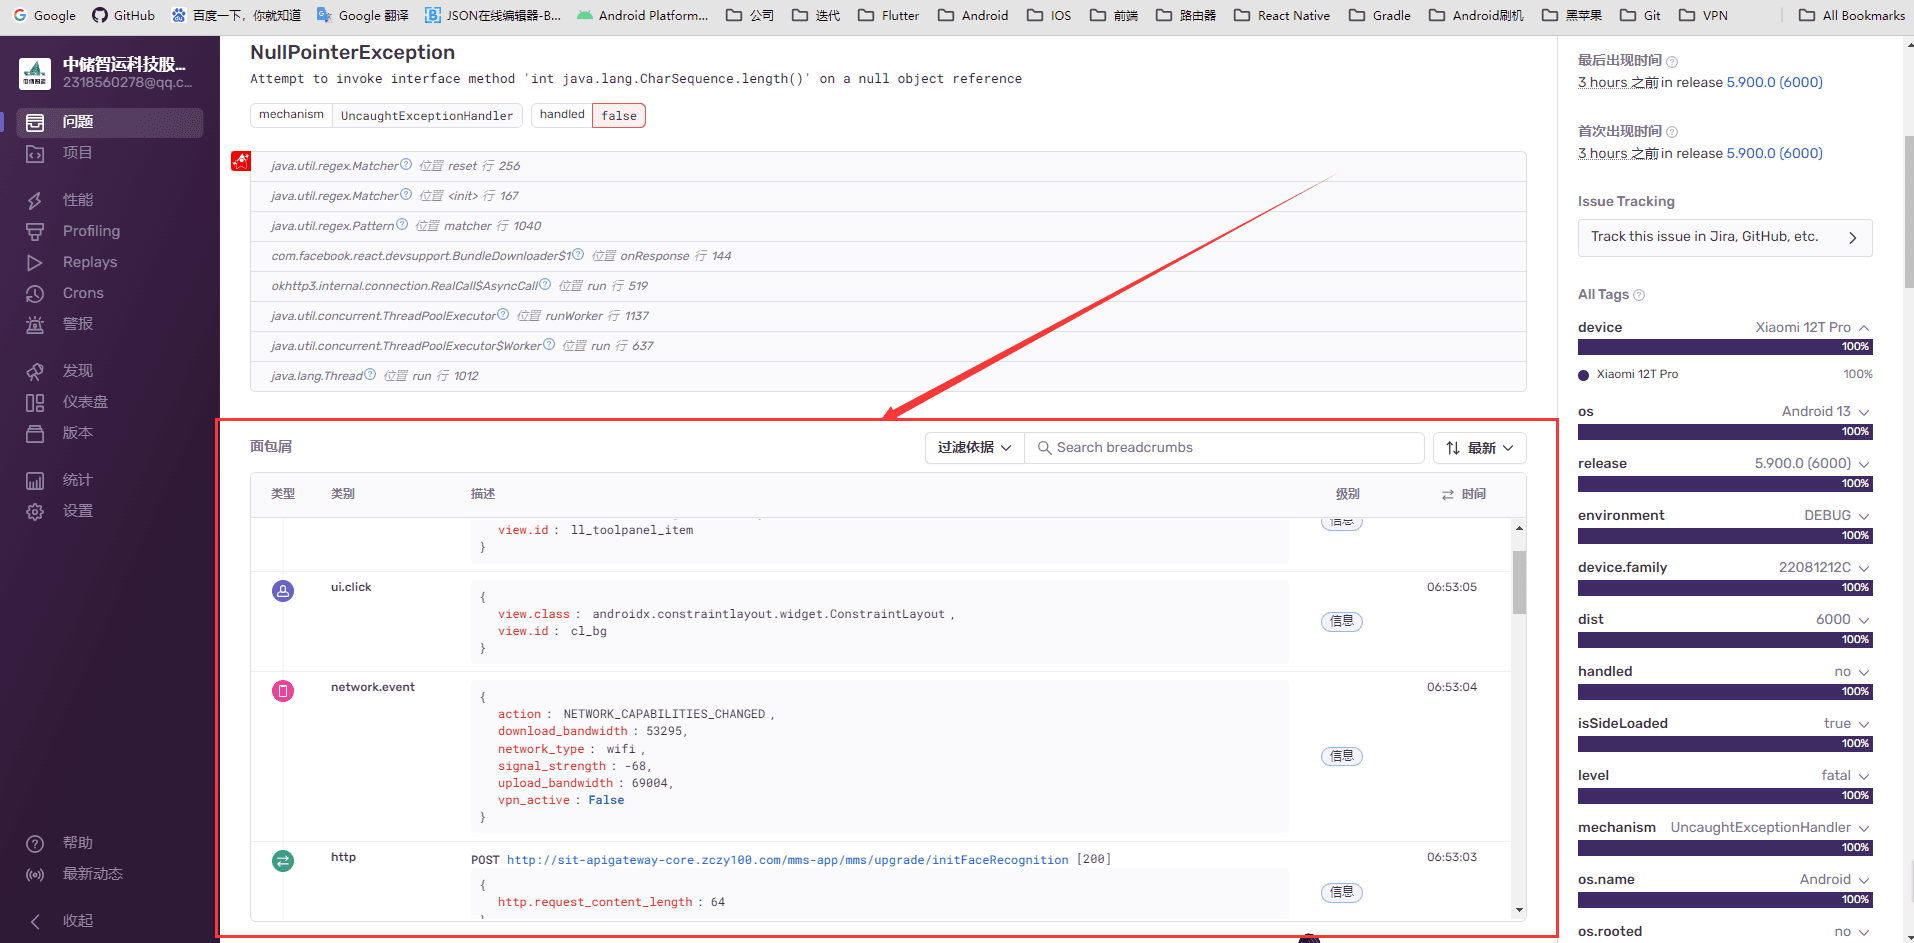
Sentry面包屑它是在问题发生之前发生的事件的踪迹。 这些事件通常与传统日志非常相似,但也能够记录更丰富的结构化数据。Sentry本身自己会自带一些面包屑,例如页面生命周期、用户点击事件、网络请求等。
当然你可以利用这个在一些场景记录你想要自定义上报的信息,例如我发现一个异常总是解决不了,我想记录一些用户在这个异常前后的一些用户行为,那么使用这个下次上报异常的时候,面包屑里就可以看到我自己定义的用户行为,来帮助我快速定位问题。
1
2
3
4
5
| Sentry.addBreadcrumb({
category: "auth",
message: "Authenticated user" + user.email,
level: "info"
});
|
Sentry上报用户信息自定义
Sentry本身上报会自动生成一个用户Id,但是这个Id是一个随机的UUID,不方便我们在实际生产环境中查找对应的用户。Sentry提供了几个上报拦截回调,你可以在这些回调里去做一下处理。
- beforeSend :异常上报拦截
- beforeSendTransaction :事件上报拦截
- beforeBreadcrumb :面包屑上报拦截
 1
 2
 3
 4
 5
 6
 7
 8
 9
10
11
12
13
14
15
16
17
18
19
20
21
22
| Sentry.init({
dsn: 'http://c0c9f0d0b6726039a6bf140829b5aaf4@172.20.22.165:9000/2',
environment: __DEV__ ? 'DEBUG' : 'RELEASE',
tracesSampleRate: 1.0,
//面包屑过滤
beforeBreadcrumb: (event) => {
if (event.category === 'console' || event.category === 'touch') {
return null;
}
return event;
},
//性能采样设置用户信息
beforeSendTransaction: (event) => {
this.setSentryUserInfo(event);
return event;
},
//上报采样设置用户信息
beforeSend: (event) => {
this.setSentryUserInfo(event);
return event;
},
});
|
 1
 2
 3
 4
 5
 6
 7
 8
 9
10
11
12
13
14
15
16
17
| /**
* 注释: 设置Sentry上报用户信息
* 时间: 2024/5/8 0008 16:14
* @author 郭翰林
* @param event
*/
function setSentryUserInfo(event) {
let login = Method.getLogin();
if (login != null) {
event.user = {
username: login['userName'],
phone: login['mobile'],
versionCode: login['systemVersion'],
versionName: Method.getHostVersionName(),
};
}
}
|
Sentry上报用户行为日志
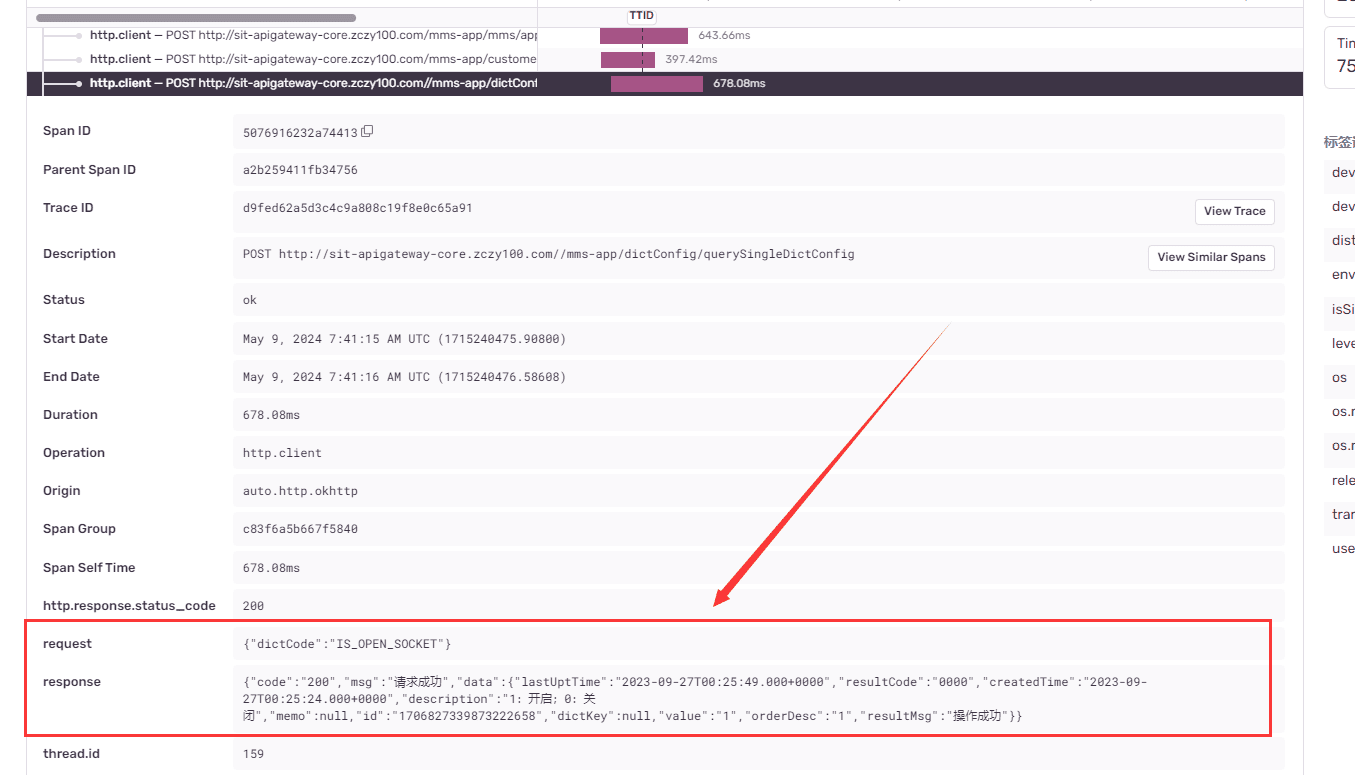
Sentry性能分析里有一项用户行为分析,可以记录用户的操作日志。从这个页面进来,用户调用了哪些接口,接口耗时多少,接口的入参出参,页面停留时间,这些都可以被记录到。
前面说到了设置tracesSampleRate采样率就会上报页面分析,但是只是一些比较基础的分析,要想更深入的记录用户行为,则需要我们自己定义。
例如我要分析用户的网络接口请求耗时,Android中比较简单直接设置一下Sentry自带的OKHttp拦截器即可,既可以自动把接口请求归类到页面分析中,其他端应该也是类似。
 1
 2
 3
 4
 5
 6
 7
 8
 9
10
11
| override fun getInterceptor(): Interceptor {
return SentryOkHttpInterceptor(beforeSpan = { span, request, response ->
//请求入参
requestSpan(request, span)
//请求回参
if (response != null) {
responseSpan(response, span)
}
span
})
}
|
如果我想要进一步对接口进行分析,查看接口的入参和出参,则需要在上报之前对接口的面包屑做一次塞值处理。这样我上报的日志就会有接口的入参和出参信息
 1
 2
 3
 4
 5
 6
 7
 8
 9
10
11
12
13
14
15
16
17
18
19
20
21
22
23
24
| /**
* 注释:接口请求面包屑构造
* 时间:2024/5/8 0008 11:22
* 作者:郭翰林
*/
private fun requestSpan(request: Request, span: ISpan) {
val requestStringBuffer = StringBuffer()
val requestBody = request.body
val buffer = Buffer()
requestBody?.writeTo(buffer)
val contentType = requestBody?.contentType()
val charset: Charset =
contentType?.charset(StandardCharsets.UTF_8) ?: StandardCharsets.UTF_8
if (buffer.isProbablyUtf8()) {
requestStringBuffer.append("${buffer.readString(charset)}\n")
} else {
requestStringBuffer.append("--> END ${request.method} (binary ${requestBody?.contentLength()}-byte body omitted)\n")
}
val params = requestStringBuffer.toString()
span.setData(
"request",
JMEncryptBox.decryptFromBase64(params, AlgorithmType.AES).text
)
}
|
 1
 2
 3
 4
 5
 6
 7
 8
 9
10
11
12
13
14
15
16
17
18
19
20
21
22
23
24
25
26
27
28
29
| /**
* 注释:接口返回面包屑构造
* 时间:2024/5/8 0008 11:21
* 作者:郭翰林
*/
private fun responseSpan(response: Response, span: ISpan) {
val responseStringBuffer = StringBuffer()
val responseBody = response.body
val contentLength = responseBody?.contentLength()
if (!response.promisesBody()) {
responseStringBuffer.append("<-- END HTTP\n")
} else if (bodyHasUnknownEncoding(response.headers)) {
responseStringBuffer.append("<-- END HTTP (encoded body omitted)\n")
} else if (responseBody != null) {
val source = responseBody.source()
source.request(Long.MAX_VALUE) // Buffer the entire body.
val buffer = source.buffer
val contentType = responseBody.contentType()
val charset: Charset = contentType?.charset(StandardCharsets.UTF_8)
?: StandardCharsets.UTF_8
if (!buffer.isProbablyUtf8()) {
responseStringBuffer.append("<-- END HTTP (binary ${buffer.size}-byte body omitted)\n")
}
if (contentLength != 0L) {
responseStringBuffer.append(buffer.clone().readString(charset))
}
}
span.setData("response", responseStringBuffer.toString())
}
|
这样我只需要在Sentry上点开对应的接口,就可以查看对应的接口入参和出参信息
四、Sentry的搭建
 1
 2
 3
 4
 5
 6
 7
 8
 9
10
11
12
13
14
15
16
17
18
19
20
21
22
23
24
25
26
27
28
| [root@ecs-1a5c ~]# docker version
Client: Docker Engine - Community
Version: 26.1.4
API version: 1.45
Go version: go1.21.11
Git commit: 5650f9b
Built: Wed Jun 5 11:32:04 2024
OS/Arch: linux/amd64
Context: default
Server: Docker Engine - Community
Engine:
Version: 26.1.4
API version: 1.45 (minimum version 1.24)
Go version: go1.21.11
Git commit: de5c9cf
Built: Wed Jun 5 11:31:02 2024
OS/Arch: linux/amd64
Experimental: false
containerd:
Version: 1.6.33
GitCommit: d2d58213f83a351ca8f528a95fbd145f5654e957
runc:
Version: 1.1.12
GitCommit: v1.1.12-0-g51d5e94
docker-init:
Version: 0.19.0
GitCommit: de40ad0
|
1
2
| [root@ecs-1a5c ~]# docker compose version
Docker Compose version v2.27.1
|
1
2
3
| wget -b https://github.com/getsentry/self-hosted/archive/refs/tags/23.7.2.tar.gz
tar -xvf 23.7.2.tar.gz
|
1
| docker compose run --rm web createuser --superuser --force-update
|
五、Sentry日志的定时清理
- 进入postgres容器安装pg_repack清理插件
 1
 2
 3
 4
 5
 6
 7
 8
 9
10
11
12
13
14
15
16
17
18
19
20
21
22
23
24
25
26
27
28
| docker exec -it sentry-self-hosted-postgres-1 /bin/bash
apt update
apt install -y --no-install-recommends postgresql-14-repack
#切换到su用户
su postgres
pg_repack --version
# 将 pg_repack 加入 Postgres 启动配置
cd $PGDATA
psql postgres
postgres=# CREATE EXTENSION pg_repack;
CREATE EXTENSION
postgres=# \dx
List of installed extensions
Name | Version | Schema | Description
-----------+---------+------------+--------------------------------------------------------------
citext | 1.3 | public | data type for case-insensitive character strings
pg_repack | 1.4.7 | public | Reorganize tables in PostgreSQL databases with minimal locks
plpgsql | 1.0 | pg_catalog | PL/pgSQL procedural language
(3 rows)
postgres=# \q
|
- 新建脚本/data/scripts/sentry-clean.sh
 1
 2
 3
 4
 5
 6
 7
 8
 9
10
11
12
13
14
15
16
17
18
19
20
21
| #!/bin/bash
source /etc/profile
DATE_NOW=`date +%F\ %H:%M:%S`
rm -rf /data/scripts/sentry-clean.log
echo "====================${DATE_NOW}开始执行Sentry清理任务======================" >> /data/scripts/sentry-clean.log
cd ~/self-hosted-23.7.2
docker compose run --rm web cleanup --days 7 -m nodestore -l debug >> /data/scripts/sentry-clean.log
docker exec sentry-self-hosted-postgres-1 /bin/bash -c "su postgres -c 'pg_repack -E info -t nodestore_node'" >> /data/scripts/sentry-clean.log
find /var/lib/docker/volumes/ -type f -name "*.log" -exec rm {} \; >> /data/scripts/sentry-clean.log
df -h >> /data/scripts/sentry-clean.log
echo "====================${DATE_NOW}结束执行Sentry清理任务======================" >> /data/scripts/sentry-clean.log
|
1
| 00 03 * * * sh /data/scripts/sentry-clean.sh
|
1
2
| service crond reload
service crond restart
|
